Make Your Own Pottery
Clay Pot Projects: Mini Pots
This site includes online classes for dozens of clay pot projects. This online class teaches you how to throw mini pots off the hump. It's a very fun and unique technique, and mini pots are perfect for plants, seeds, honey or jam.
Throwing off the hump- The process of throwing multiple small pots on the pottery wheel from one large mass of clay.
Throwing off the hump is perfect for throwing multiples of the same pot. It allows you to enter a rhythm with the pots, and helps you to create them more consistent with each other.
This is one of my favorite clay pot projects. For some reason I never tire of it. While on the one hand it is very simple and repetitive, on the other hand each pot has it's own challenges.
You can create a whole series of matching pots, or you can experiment with the shape and make each one unique in it's own way.
Each mini pot offers an opportunity to explore shape and pottery designs without the time constraints of throwing a larger pot.
Step 1 - Centering the Hump
This may be the hardest step so take your time and get this step right. Learning to center the hump is just like learning pottery centering for any other pot.
Generally speaking, I will center about 4-6 pounds of clay for one session. This is a ball of clay about the size of a small cantaloupe. With that much clay you can throw about 15-20 mini pots, depending on the size of each one.
Tip: When you are first starting out, use a smaller ball of clay, about the size of a baseball. You can still make 2-4 pots with that, and it will be much easier to center. Once you are proficient at centering, work up to the larger ball of clay.
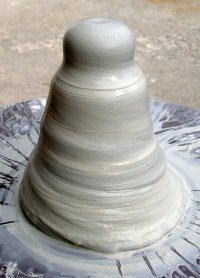
Once the clay is centered, pull it up into a tall cone shape, like a volcano, to prepare it for throwing.
Step 2 -Throwing Off the Hump
To throw a pot off the hump, start by re-centering just the top portion of the clay.
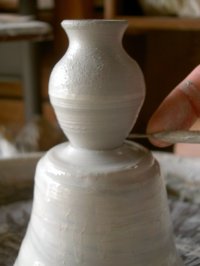
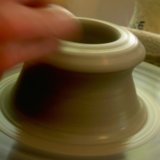
While centering it, round off the portion you are centering, creating an indentation an inch and a half down (see above photo).
This defines where the bottom of the pot will be.
Then, make a hole in the top, like you would with any other pot.
However, instead of going all the way to the bottom of the clay, stop about an inch down from the top.
Next, throw a small cylinder using just the clay you have centered.
Dry out all the water inside with a sponge and compress the bottom gently.
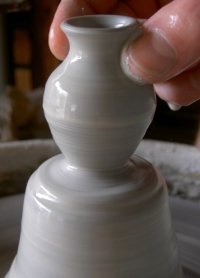
Then, close the neck in slightly to form a vase shape.
Finally, using a rib or a damp finger, slightly undercut the pot.
This finishes the shape and allows for easier cutting and removal from the wheel.
Insert the dull end of a needle tool into the pot to measure where the bottom is.
Be sure to cut the pot off the wheel at least 1/4" below that spot.
Step 3 - Cutting the Pot From the Hump
There are three basic ways to cut a pot from the hump. Try all three and use the one that works best for you. These techniques can be used on other clay pot projects thrown off the hump as well.
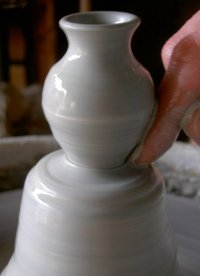
I personally use the first method below (see photo at right). I just find that my mini pot survival rate is better with that method.
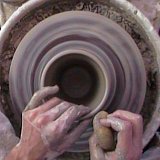
1) Needle Cutting (moving wheel)- Start by spinning the wheel very slowly. Gently wrap your left fingers around the base of the pot in preparation to remove it from the wheel.
With a steady motion cut a clay needle through the bottom of the pot until it is free. Remove it with your left hand. The trick is to keep the needle very level and steady until the pot has been completely removed.
2) Needle Cutting (stationary wheel)- With this method everything is the same as above except the wheel is not spinning. This method is safer because there is less motion, but the lack of spinning can make it more difficult to get a smooth, even cut.
3) String Cutting- Cutting your wheel off with a thin string is a really cool and creative way to do it. If you can master this method it really works well. It works well for me... when I do it right... but when I don't I tend to hack my pots pretty badly.
To do it, slowly spin the wheel. Hold a light string tightly in one hand. With the other hand gently drape the string along the spot where you want the cut.
The spinning motion will naturally wrap the string around the pot while your other hand is still holding onto it.
When the string has circled the pot, pull decisively on the string, slicing it completely under you clay pot project. The trick is to get the string wrapped evenly around the pot, and to pull the string straight through.
Step 4 - Finishing Your Mini Pot
To finish your mini pot, dry it until the top is leather hard. Then turn it over and smooth the bottom.
Create an indent in the middle so the bottom has a rim or "foot" to rest on. Finishing your clay pot projects by trimming a foot will keep them from wobbling.
I like to imprint the bottom of my clay pot projects with a
homemade pottery stamp.
This will give your clay pot projects a little pizazz and a surprise for whoever picks it up.
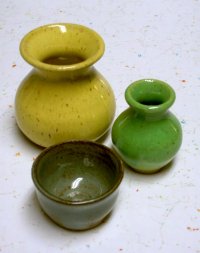
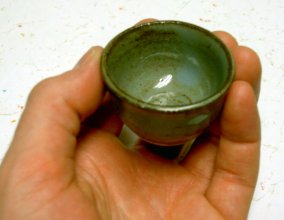
Try out different shapes and sizes, like the tiny bowl in the above photo. Thanks for following my online class for throwing mini pots off the hump. Happy Potting.
Recommended Reading

250 Tips, Techniques, and Trade Secrets for Potters

The Complete Potter

Simon Leach's Pottery Handbook

The Potter's Bible
Return to Clay Pot People Fun Stuff
Return From Clay Pot Projects - Mini Pots
To Pottery on the Wheel Homepage
Learn Right
The First Time
Pottery on the Wheel for Beginners
is a complete beginners guide
to learning pottery.
It will
take you from
never having touched clay
to creating finished pottery
you can use every day.
Also read it on Kindle
Featured Pages
Choose Your Wheel
Thank you so much for
visiting my website!
Discover How I Made It!
Happy Potting!
- Steve



New! Comments
Have your say about what you just read! Leave me a comment in the box below.