|
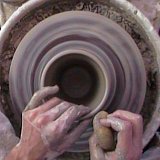
Clay Coffee MugsThere is nothing like the experience of drinking coffee from handmade clay coffee mugs. Clay coffee mugs are one of my favorite things to make and to use. Whether it they are normal or unusual, large or small, pottery coffee mugs are fun to make and use. Whether you like big coffee mugs or small coffee cups, you'll find many unique designs throughout this site. More importantly, you'll learn how to make your own mug. Once you've mastered making your own mugs and adding handles to them, you'll be creating all kind of unique pottery mugs large and small.
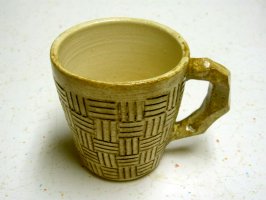
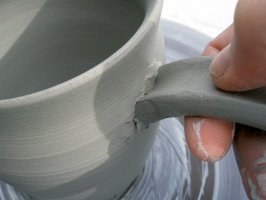
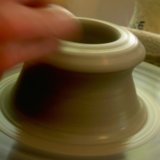
The opportunities for creativity and variation are amazing for such a simple, functional pot. Here are a few examples of interesting mug variations. This first green mug has a hand-pulled handle. Hand pulled handles take a little more practice than the coil handle I'll show you on this page, but check it out when you feel ready. This tan mug has a carved handle. An extra thick handle is attached in the same way as we'll attach the coil in the instructions below. The handle is allowed to dry a little to harden up. Then the excess is carved away, leaving the unique hand carved handle design. The texture on the mug was carved into the clay with a fork, while the clay was leather hard. It was then stained, wiped off the surface, and finally glazed. So, without further delay, let's learn to create a mug. The main challenge in making pottery coffee mugs lies in the handle. Therefore, that is where we'll spend the majority of our time. But first, we'll make the mug so it has some time to dry. The Mug BodyTo make a mug you'll first throw a cylinder five inches tall and three inches wide. Straight walls will work fine, or you can curve the walls a bit for a more interesting shape. Check out the Learn Pottery link to learn how to throw a basic cylinder. Once you have created the mug body, remove it from the wheel. Let it dry a few hours until the rim is dry enough to touch. Turn your pot upside down and smooth the bottom. Let it dry another hour or two until the whole thing is leather hard. When you turn the pot upside down and you're waiting for it to dry some more, that's the perfect time to start the handle. The HandleTake a ball of clay the size of a small peach. Form it into a coil by rolling it on the table until it forms a long rope. Work both hands back and forth down the length of it to keep it even. Stop when the coil is a half an inch thick. Look at your mug and decide where you want to attach the handle. Cut the coil to the right size. Make sure there is enough room for two fingers to fit into the handle. Keep in mind that, depending on the type of clay you use, the handle with shrink about ten percent when it is fired. Next, bend the handle into a a "C" shape so it's ready to go on the mug. Finally, let the handle dry along side your mug body for about an hour so it will firm up a bit. Attaching the HandleUse a clay needle or toothbrush to "score" or roughen up, the two spots on the mug where the handle will attach.
Add a blob of "slip" or clay mud, to the two spots on the mug. This will act as glue to hold the handle in place. Then, press the handle onto the mug. Be sure to support the wall from the inside with your other hand so it doesn't collapse. If your handle doesn't survive the the attachment process, that's okay. Just cut it off with a clay knife and make another handle. While you're making your new handle, be sure to cover your pot with plastic so it doesn't get too dry. Finish the MugWay to go! You're almost finished making your first of many handmade clay coffee mugs. To finish, smooth the edges where the handle was attached using a damp sponge or brush. That's it. You're finished! If possible, dry you mug upside down to keep the handle from drooping. Also, dry it slowly by covering it loosely in plastic for several days. Another trick is to paint wax resist around the handle joints. The key with clay coffee mugs it to dry them slowly. If they dry too fast then your handle may crack. It usually takes 6 or 8 handles to start feeling confident with them, so keep at it. Just think, before long you'll be making clay coffee mugs like a pro and everyone will be begging you for one. Other Mug ProjectsAfter you're comfortable with making coffee mugs, try your hand at making a
ceramic coffee travel mug.
Or you can visit the
Main Pottery Coffee Mug Page.
As always, thanks for reading and Happy Potting. Return From Clay Coffee Mugs |
Learn Right
The First Time
Pottery on the Wheel for Beginners
is a complete beginners guide
to learning pottery.
It will
take you from
never having touched clay
to creating finished pottery
you can use every day.
Also read it on Kindle
Featured Pages
Choose Your Wheel
Thank you so much for
visiting my website!
Discover How I Made It!
Happy Potting!
- Steve


