|
Ceramic Bird Houses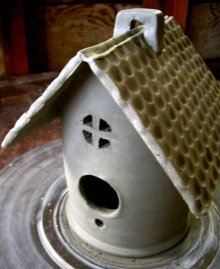
Plans for how to make ceramic bird houses. Different designs of bird houses are for sale, but you can be the artist and follow these simple plans to make your own handmade ceramic bird feeder or birdhouse. Your birds will love these handmade ceramic bird houses as much as you love making them. They're fun to make and bring years of enjoyment to the inhabitants of your yard. It looks complicated, but don't worry. It's made much easier by creating the parts separately and then putting them together at the end. We'll build this clay pot project in two parts, the house and the roof.
The House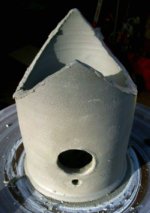
For the bird feeder house throw a ten inch tall by five inch wide cylinder with a floor. Allow it to dry slightly but not quite leather hard. Carve a 2 inch hole in the wall 2 inches up from the bottom for the bird door. Then carve a 1/4 inch round hole 1 inch from the bottom for the perch. (After firing insert a 3 inch long wooden dowel into the bottom hole as a perch for the birds.) Cut two thirty degree angles out of the top of the walls to create a peak for the roof. Hold a flat piece of wood against your cuts to check for evenness. Cover the house with a plastic bag and set it aside. Tip: To create an "upstairs window" for your birds, carve four 1/2 inch squares in a square pattern into the wall above the door.
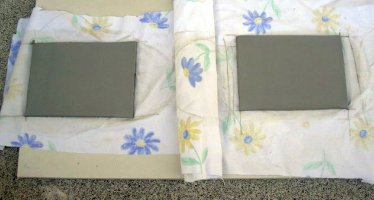
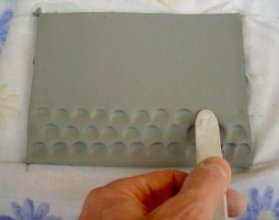
The RoofRoll out two slabs of clay with a rolling pin and cut them into 4x6 inch rectangles. (Notice the blue flowered fabric? I used an old bed sheet underneath the clay to keep it from sticking to the table.) Allow them to dry to the same dryness as the house. Tip: When rolling your slabs place a paint stirring stick or ruler on each side of the clay. Use them as a guide for your rolling pin. As the clay flattens, the rolling pin will roll on the top of the sticks giving you very even slab with perfect thickness. If you like you can imprint shingle shapes into the surfaces to add character. (see photo below) Add slip, and attach the roof slabs to the tops of the walls on the house. Smooth the two slabs together at the peak to seal the roof. Finally, attach a strong clay loop to the peak of the roof. Leave a hole in the loop big enough to run a string through. The birdhouse will hang from this loop. For extra fun add a porch, bushes, a mailbox, or any other decorations to the front. Once it is fired and glazed, pour some birdseed inside, attach your dowel for the perch, hang it from a tree, and watch for happy birds to arrive at your beautiful ceramic bird feeder. Until then, Happy Potting. Return From Ceramic Bird Houses |
Learn Right
The First Time
Pottery on the Wheel for Beginners
is a complete beginners guide
to learning pottery.
It will
take you from
never having touched clay
to creating finished pottery
you can use every day.
Also read it on Kindle
Featured Pages
Choose Your Wheel
Thank you so much for
visiting my website!
Discover How I Made It!
Happy Potting!
- Steve


